
1. Website structure
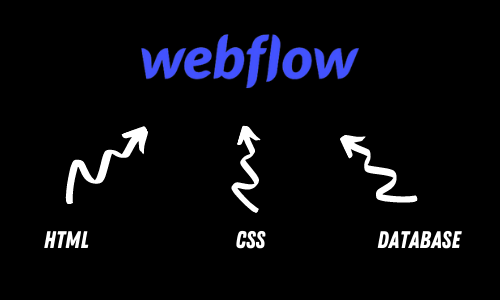
First: how websites are structured:
- HTML is the content on the page
- CSS is for position, fonts, colors, etc
- For dynamic sites, a database stores the content
Normally, you need code to turn this into website. Webflow does it for you, visually! 💯
2. Box Model
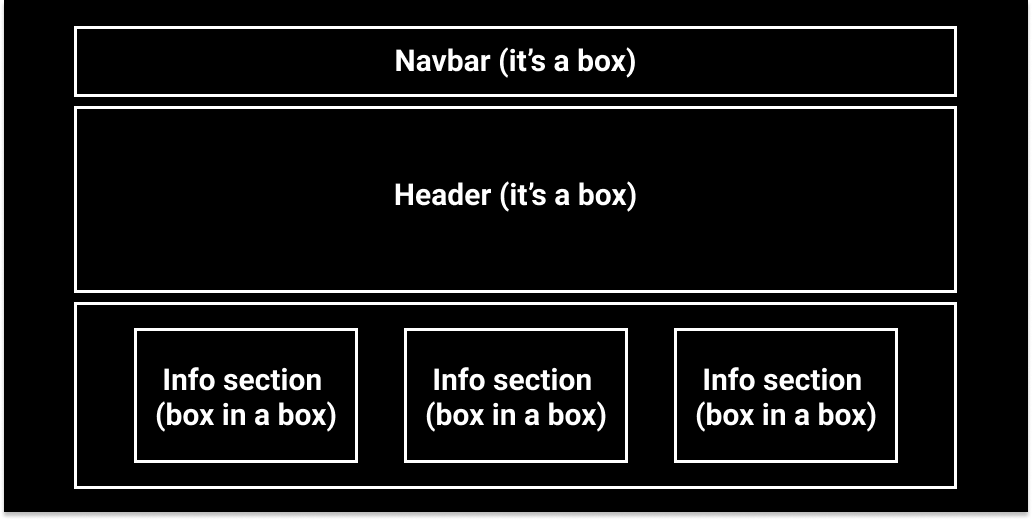
To understand Webflow: You need to understand the box model. It’s the key to putting things where you want them to be.
Everything on a web page is made up of boxes:
- CSS let's you adjust the style and position of each box
- The most common “box” is called a div.
3. Build visually
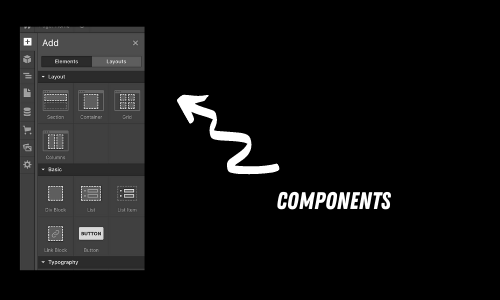
Webflow lets you build visually👀, without code. Simply drag in components to build your site. Components include:
Text, Forms, Images, Video, Buttons, and Divs (boxes to help position content where you want).
4. Component Layout
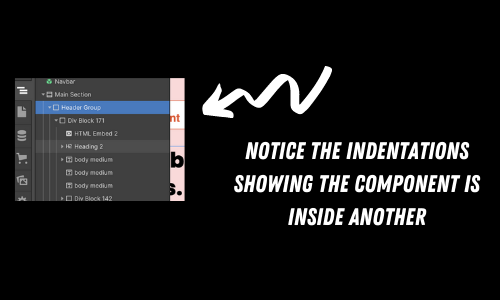
After dragging in a component, check the navigator.
This is where the box model comes in.
You can see which components are within other components (inside other boxes) with indentations. You can put as many components inside other components that you’d like.
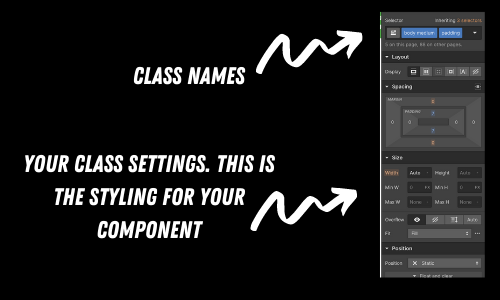
5. Design
Let's talk design! When you select a component, you can style it 🖌️
First add a class name, which is used for style settings. Classes are reuseable throughout your site.
This saves you a TON of time later on.Class settings include font, background, border, and MUCH more.
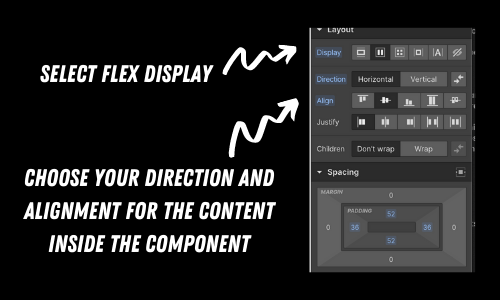
6. Position
Moving on to position 🔀 The Layout settings lets you position your content within a div on the page. Flex is my favorite, because it makes it super easy to position things how you want.
- Choose your direction (vertical or horizontal)
- Choose your alignment
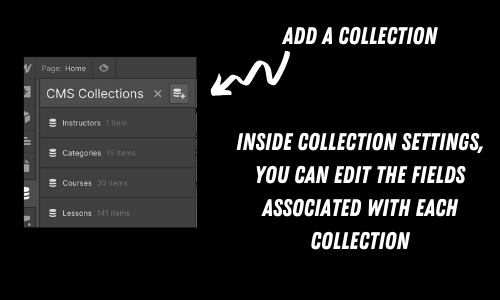
7. CMS Magic
The CMS is what really makes Webflow ✨magical✨
You can store lots of data in the backend, and display it on your site automatically.
- Collections are like a list (like blog posts)
- The collection items are like the individual blog posts inside of the collection list
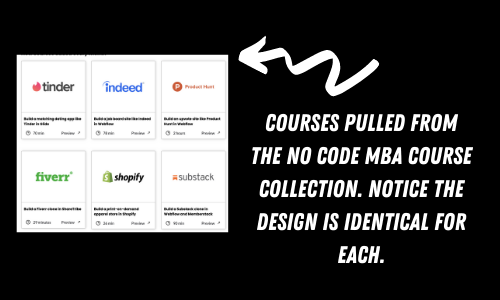
8. Collection Lists
Use a Collection List component to display all the items in your collection (all the blog posts, for example).
When you update your CMS, your site content updates automatically 🤯
When you style one item, all items will use the same style. This saves a TON of time.
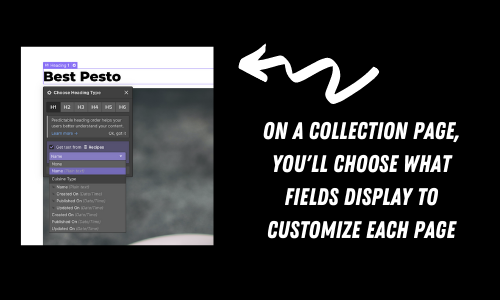
9. Collection Pages
Let's talk about collection pages.
An example is an individual recipe page on a recipe blog.
If you have 100 recipes, Webflow will create 100 webpages, with the same design, AUTOMATICALLY. It's magical 🪄
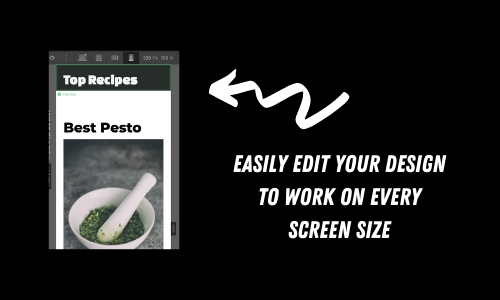
10. Responsive design
Responsive design is about making your site work on every screen size.
Webflow makes this super easy!
Just click the device on the top, and adjust your styles. Any adjustments on a larger size are automatically applied to smaller, but not the other way around.
That's it! If you understand these fundamentals, you'll be building Webflow sites in no time. 👀
Want to watch a tutorial walking you through each point?
Check out our full in-depth Webflow course to go from beginner to expert!
Frequently Asked Questions
Do I need coding experience to work with Webflow?
No. The guide is written for no-code and AI-assisted builders. You may run into concepts like APIs, prompts, databases, or workflows, but the goal is to make the process usable without traditional software development.
What is the first step for Webflow?
Start by defining the exact outcome you want, then choose the simplest tool or workflow that can produce it. The article covers related steps like Website structure, Box Model, and Build visually.
How long does it take to build Webflow?
A simple prototype can often be built quickly, but a production-ready version takes longer because you need to test the data, design, permissions, automations, and edge cases.
What mistakes should I avoid when building Webflow?
Avoid starting with too many features, skipping validation, or choosing a tool before you understand the workflow. Build the smallest useful version first, then improve it based on real feedback.
Advertiser disclosure: some links on this website are affiliate links, meaning No Code MBA may make a commission if you click through and purchase.